


Hydroponic systems are distinguished by their being active or passive. In an active hydroponics system the nutrients are provided to the plants by making use of a pump while in a passive hydroponics system the passing of the nutrients to the plant depend upon the growing medium. However the passive Hydroponics system do not provide sufficient oxygen to the plant and hence the growth rate of the plants are not optimum. Hydroponic systems are also different on recovery and non recovery type. In recovery system the nutrients are recycled while in a non recovery system it is just the opposite. Here are some different types of hydroponics.
1. Ebb and flow system
 Ebb and flow is one of the most preferred ways of doing Hydroponics gardening. This system is active as well as recovery type. Also known as flood and drain this system is quite easy to understand. The plant is kept in a reservoir containing nutrient solution. When the pump is started the nutrient are pumped in to the plant. After the water reaches the determined level, it is drained in to a river while the oxygen is sucked by the roots.
Ebb and flow is one of the most preferred ways of doing Hydroponics gardening. This system is active as well as recovery type. Also known as flood and drain this system is quite easy to understand. The plant is kept in a reservoir containing nutrient solution. When the pump is started the nutrient are pumped in to the plant. After the water reaches the determined level, it is drained in to a river while the oxygen is sucked by the roots.2. Nutrient film technique
 Nutrient technique is also a recovery type active Hydroponic system. In this kind of hydroponics system a submersible pump is used and the roots are suspended in a grow tube. The grow tube is in such an angle that the solution of the nutrients get recycled by flowing over the roots and then coming back to the reservoir. The oxygen requirement is solved by making use of air stones or air stones. This system is highly effective and a bit difficult to build. A single mistake can cause the whole plant to dry.
3. Floating Hidroponic
 This is the simplest of all active hydroponics systems. The platform that holds the plants is usually made of Styrofoam and floats directly on the nutrient solution. An air pump supplies air to the air stone that bubbles the nutrient solution and supplies oxygen to the roots of the plants. It can also called Water culture, it is the system of choice for growing leaf lettuce, which are fast growing water loving plants, making them an ideal choice for this type of hydroponics system. Very few plants other than lettuce will do well in this type of system. This type of hydroponics system is great for the classroom and is popular with teachers.
 4. Drip Irrigation
 This method isprobably the most widely used type of hydroponic system in the world. Operation is simple, a timer controls a submersed pump. The timer turns the pump on and nutrient solution is dripped onto the base of each plant by a small drip line.
 Drip irrigation is the most efficient method of irrigating. While sprinkler systems are around 75-85% efficient, drip systems typically are 90% or higher. What that means is much less wasted water! For this reason drip is the preferred method of irrigation in the desert regions of the United States. But drip irrigation has other benefits which make it useful almost anywhere. It is easy to install, easy to design, can be very inexpensive, and can reduce disease problems associated with high levels of moisture on some plants.
5. Aeroponics
 This method is probably the most high-tech type of hydroponics gardening. Like the N.F.T. system the growing medium is primarily air. The roots hang in the air and are misted with nutrient solution.
 The misting are usually done every few minutes. Because the roots are exposed to the air like the N.F.T. system, the roots will dry out rapidly if the misting cycles are interrupted.
A timer controls the nutrient pump much like other types of hydroponic systems, except the aeroponics system needs a short cycle timer that runs the pump for a few seconds every couple of minutes.


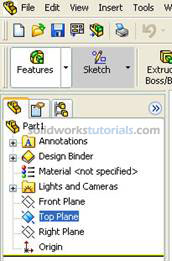
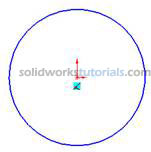
 in Command Manager, click Circle
  . As you can see on upper right corner sketch icon appear indicate that you’re on sketch mode
 .
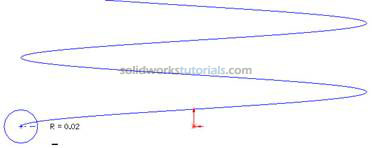
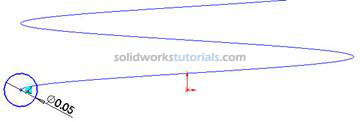
. no need to be exact the size will define in later step. Press keyboard ESC to end circle sketch.
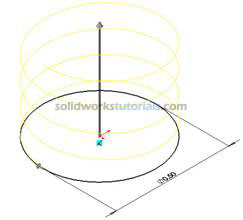
 , and start dimensioning pick circle edge and set to 0.50in
 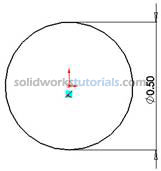 . Press keyboard ESC to end smart dimension.
 .
.
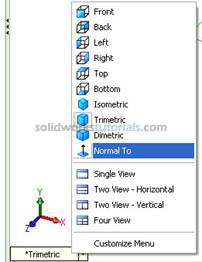
 , click Normal To
 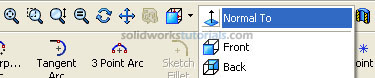 .
.
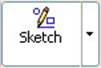
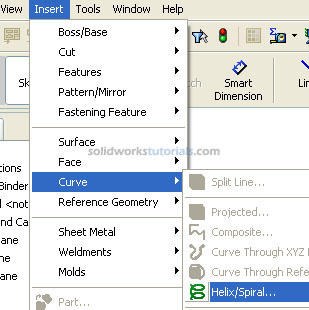
 . Click Features
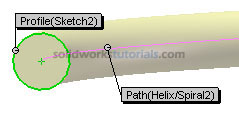
 and activate features menu. Click Swept Boss/Base
 and set Profile to Sketch2 by click on circle sketch
 and set Path by click helix path
 and
and 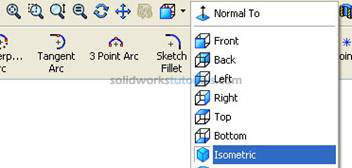
 . As you can see on upper right corner sketch icon appear indicate that you’re on sketch mode
 .
.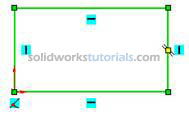 no need to be exact the size will define in later step. Press keyboard ESC to end rectangle sketch.
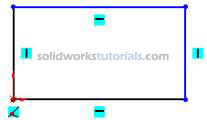
 , and start dimensioning pick vertical line and set to 2.00in , pick horizontal line and set to 2.00in
 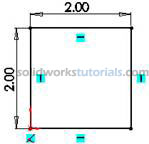 . Press keyboard ESC to end smart dimension
 and activate features menu. Click Extruded Boss/Base
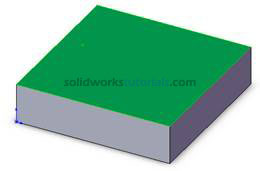
 and set D1 to 0.5in
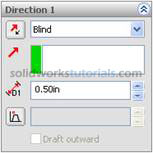 and
and 
 , click Normal To
 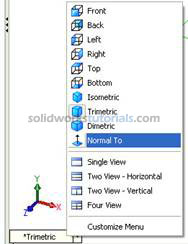 . Activate sketch menu by click Sketch
 and select Circle
 . Sketch 4 circle at four edges.
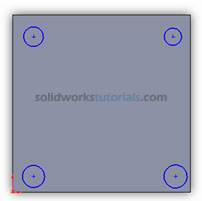
 , set diameter circle to 0.2in . Select distance for edge set to 0.3in
 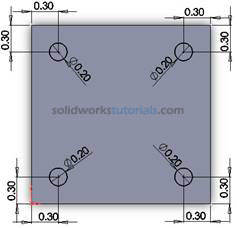 .
. and sketch one circle at center
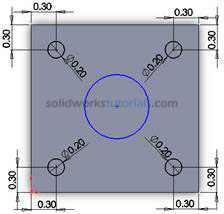 .
. , set diameter circle to 1.0in . Select distance for edge set to 1.0in.
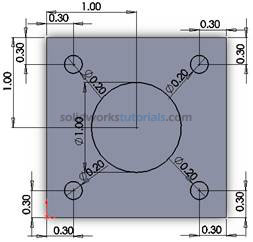
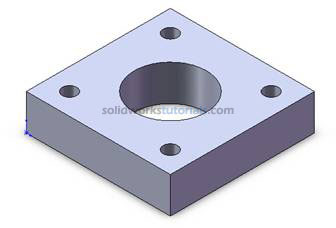
 , click Extruded Cut
 , under Direction 1, Through All
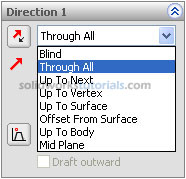 and
and